
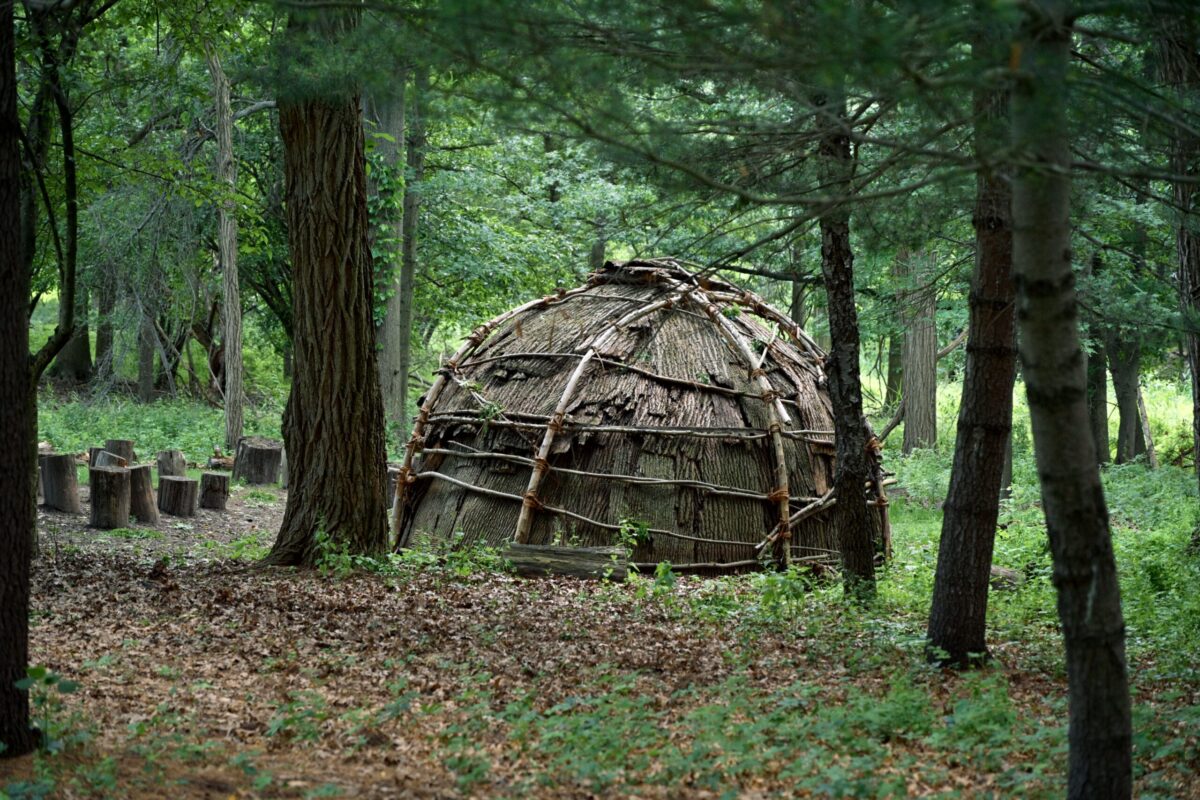
Learn how to build a debris hut for survival warmth. This step-by-step guide covers site selection, frame construction, and insulation to keep you warm overnight in the wild.
Introduction
When you’re facing an unexpected night in the wild, a debris hut isn’t just a shelter; it’s your lifeline. This primitive yet incredibly effective structure can mean the difference between a miserable, hypothermia-risking night and a relatively warm, safe one.
Why a debris hut is an excellent survival shelter for warmth? It leverages natural materials to create a thick, insulated cocoon that traps your body heat. It requires no specialized tools and can be built quickly with practice.
What you’ll learn: You’ll get a complete, step-by-step guide to constructing this essential survival shelter, ensuring you can stay warm overnight when it matters most.
Understanding the Debris Hut: Principles of Warmth
A debris hut works on a simple, powerful principle: the ‘burrito’ effect. You’re essentially creating a thick, insulated cocoon around yourself. The goal isn’t to block wind entirely (though it helps), but to trap your body heat within layers of natural material.
Insulation is Key: Trapping Air for Heat Retention
Insulation is key here. Think of it like a high-performance sleeping bag made of leaves and branches. The countless air pockets within the packed debris trap warm air and prevent cold air from penetrating, holding your precious body heat close.
Minimal Tools, Maximum Effectiveness
The beauty? You need minimal tools – often just your hands and a sturdy stick – to achieve maximum effectiveness. This makes it an ideal emergency shelter when you have little to no gear.
Site Selection: Choosing Your Survival Bedroom
Choosing the right spot for your debris hut is as important as the build itself.
Safety First: Avoiding Hazards
First, safety. Scan for deadfall – trees or branches that could come down in wind or rain. Avoid low-lying areas prone to flash floods, and steer clear of obvious animal trails; you don’t want unexpected visitors.
Wind Protection: Natural Barriers are Your Friend
Wind protection is crucial for warmth. Look for natural barriers like a dense stand of trees, a large boulder, or a slight depression in the terrain. These will shield your hut from chilling winds.
Drainage: Stay Dry, Stay Warm
Drainage is another critical factor. Build on slightly elevated ground to ensure water runs away from your shelter, not into it. Staying dry is paramount for staying warm.
Proximity to Resources: Water, Firewood, Building Materials
Finally, consider proximity to resources: a water source, firewood (if you plan a fire nearby), and, most importantly, an abundance of building materials – leaves, pine needles, grasses, and sturdy branches.
Gathering Your Materials: Nature’s Hardware Store
Before you even start digging, gather your materials. This pre-planning saves time and energy.
The Ridgepole: The Backbone of Your Shelter
This is the backbone of your shelter. You need one long, sturdy branch, roughly 8-10 feet long and at least 3-4 inches thick. It needs to support the weight of all your insulation.
Ribs (Rafters): Creating the Frame
Collect numerous smaller, flexible branches, 4-6 feet long and 1-2 inches thick. You’ll need enough to create a dense framework.
Debris, Debris, and More Debris: Leaves, Pine Needles, Grasses
This is your insulation. Gather massive piles of dry leaves, pine needles, grasses, ferns, moss, and any other organic material you can find. The more, the better. Think of it as collecting a small mountain.
Optional: Cordage or Natural Ties
If you have it, cordage can help secure your frame. If not, natural ties like long strips of bark (cedar, inner bark of basswood) or strong vines can work, but often aren’t strictly necessary for a basic debris hut.
Building the Frame: Laying the Foundation for Warmth
Now, construct the skeleton of your warmth machine.
Securing the Ridgepole: The Lean-to Method or Tripod
The simplest method is the lean-to. Find a sturdy tree or a large rock and lean one end of your ridgepole against it, at about a 30-45 degree angle. The other end rests on the ground. Alternatively, create a tripod by lashing three sturdy sticks together at the top, forming an A-frame, and resting your ridgepole on the crossbar.
Attaching the Ribs: Close Spacing is Crucial
Starting from the top of your ridgepole, lean your smaller rib branches against it, extending down to the ground. Place them close together, no more than 6-8 inches apart. This creates a dense lattice for your insulation.
Creating the Entrance: Small and Manageable
Design a small, manageable entrance at the wider end of your hut. This opening should be just large enough for you to crawl through. A smaller entrance means less heat loss.
Reinforcing the Structure: Stability is Key
Once your ribs are in place, weave smaller, flexible branches horizontally through them. This adds stability and prevents the ribs from shifting under the weight of the debris. You want a strong, stable frame.
Insulating Your Hut: The Heart of the Warmth
This is where the magic happens – turning a frame into a warm cocoon.
Layering the Debris: Start Thick, Go Thicker
Start piling your collected debris onto the frame. Begin at the bottom and work your way up, overlapping layers like shingles. Don’t just dump it; pack it down firmly.
The ‘Rule of Arm’s Length’: How Much is Enough?
This is your golden rule for insulation thickness. Your debris layer should be at least an arm’s length thick (about 2-3 feet) all around the hut. This might seem like a lot, but it’s the minimum for true warmth in cold conditions. Keep adding and packing.
Sealing Gaps: No Cold Air Allowed
As you build up the layers, constantly check for gaps or thin spots. No cold air allowed! Pay particular attention to where the ribs meet the ground and around the entrance.
The Debris Door: Your Final Seal
Once the main structure is insulated, create a “door” from a large pile of packed debris. This will be pulled into place after you crawl inside, completely sealing your hut and trapping your body heat.
Final Touches and Testing Your Shelter
You’re almost ready for a warm night.
Internal Bedding: A Debris Mattress for Comfort and Insulation
Don’t forget the inside! Gather a thick layer of dry leaves, pine needles, or grass for your internal bedding. This debris mattress should be at least 6-12 inches thick. It insulates you from the cold ground, which can steal heat rapidly.
Testing for Drafts: A Quick Crawl-Through
Before nightfall, crawl inside your finished hut. Pull your debris door into place. Lie down and feel for any drafts. If you find a cold spot, crawl out and add more debris to that area.
Practicing Fire Safety (if applicable nearby)
If you plan to have a fire, ensure it’s a safe distance from your hut, downwind, and in a cleared area. Never build a fire inside a debris hut.
Leaving No Trace: Respecting the Environment
When you’re done with your shelter, dismantle it and scatter the materials, returning the area to its natural state. Respect the environment.
Conclusion
Building a debris hut is a fundamental survival skill that directly translates to your warmth and safety in the wilderness. You’ve learned the principles of insulation, how to select a prime location, gather materials, construct a sturdy frame, and, most importantly, create a thick, heat-trapping cocoon.
Practice Makes Perfect: Build Before You Need It
Don’t wait for an emergency; build a debris hut in your backyard or on a practice outing. The more you build, the faster and more efficiently you’ll become.
Stay Safe, Stay Prepared
Stay safe, stay prepared, and know that you have the skills to create warmth when you need it most.