
Learn essential survival skills for building emergency shelters in the wild. This guide covers location, materials, and techniques to protect yourself from the elements.
The ‘S.T.O.P.’ Principle and Initial Considerations
Before you even think about gathering materials, you need to assess your situation. Panic is your worst enemy; clear thinking is your best friend.
Stop, Think, Observe, Plan
Take a moment to calm down, evaluate your surroundings, and formulate a strategy. Don’t rush into building. Your first few minutes are crucial for making sound decisions.
Assessing Your Environment: Weather, Terrain, Resources
What’s the immediate weather forecast? Is a storm rolling in, or is it clear? Is the terrain flat, hilly, or rocky? Are you in a dense forest, an open field, or near a water source? What natural materials are readily available – branches, leaves, snow, rocks, or even a fallen log? Your environment dictates your options.
Prioritizing Your Needs: Protection from Elements, Predators
Your primary goal is to protect yourself from hypothermia, hyperthermia, rain, wind, and potential animal threats. Shelter is often the first priority after securing water, as exposure can kill faster than thirst. Think about what’s most likely to harm you first.
Choosing the Right Location
Location, location, location! Where you build your shelter is almost as important as how you build it. A poorly chosen site can negate all your hard work.
Safety First: Avoiding Hazards
Stay away from flash flood zones like dry creek beds or low-lying areas that could become waterlogged. Avoid areas prone to rockfalls, especially at the base of cliffs or steep slopes. Steer clear of dead trees or large, hanging branches (“widowmakers”) that could fall unexpectedly. Also, avoid obvious animal trails or dens; you don’t want to share your space with an unwelcome guest.
Natural Protection: Using Topography to Your Advantage
Look for natural windbreaks such as large rocks, dense tree lines, or a slight depression in the ground. An overhang or a thick canopy of evergreen trees can offer some initial cover from rain or snow. A slight rise can protect your shelter from ground-level water runoff.
Proximity to Resources: Water, Firewood, Building Materials
Ideally, your shelter should be close to a water source, dry firewood, and an abundance of suitable building materials. However, ensure you’re far enough from water sources to avoid animal traffic that frequents them. Balance convenience with safety.
Essential Shelter Building Principles
Regardless of the type of shelter you build, these core principles will ensure its effectiveness and your survival.
Insulation: Keeping Warm or Cool
Air pockets are key to insulation. Use layers of dry leaves, pine needles, moss, or even grass to create a thick barrier against the ground and walls. This traps air, regulating the temperature inside your shelter, keeping you warm in cold conditions and cooler in hot ones. Think of it like a natural sleeping bag.
Waterproofing: Staying Dry
Moisture is a killer. Overlap materials like large leaves, bark, evergreen boughs, or even a tarp (if you have one) like shingles on a roof. This sheds water away from the shelter’s interior. Ensure a slight slope to your roof to facilitate runoff.
Windproofing: Battling the Elements
Wind can strip away body heat rapidly. Build your shelter low to the ground and orient its opening away from prevailing winds. Use dense materials to block drafts and seal any gaps in your walls. A smaller entrance also helps retain heat.
Structural Integrity: Stability and Strength
Your frame must be sturdy enough to withstand wind, snow, or rain. Use strong, healthy branches for your main supports and secure them properly. Test the stability as you build; a collapsing shelter is worse than no shelter at all.
Simple & Quick Shelter Types (For Immediate Needs)
When time is of the essence, these shelters can be constructed relatively quickly, offering immediate protection.
Lean-To Shelter: The Basics
A lean-to is one of the simplest and fastest shelters. Find a sturdy horizontal branch or a low-hanging tree limb. Lean a long pole against it, then lean smaller branches or sticks along the length of the pole to create a frame. Cover this frame with leaves, pine boughs, bark, or a tarp. It’s excellent for quick wind and rain protection from one direction.
Debris Hut: Maximizing Natural Insulation
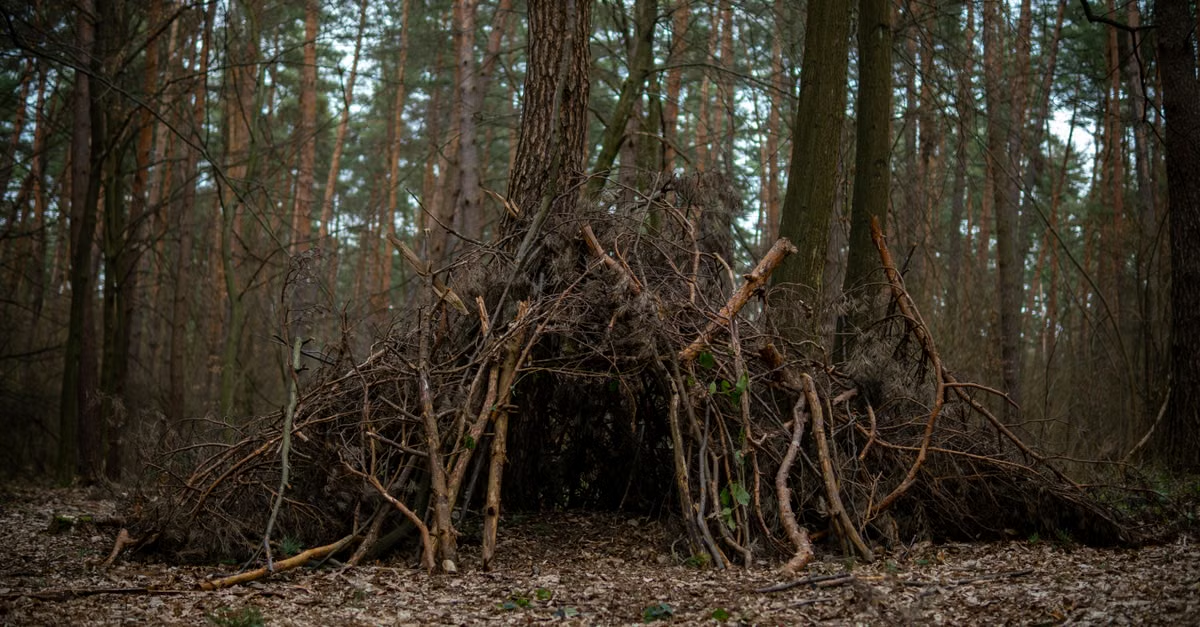
The debris hut is a fantastic option for cold weather. Start with an A-frame structure, often using a strong ridgepole supported by a tripod or leaning against a tree. Then, pile an enormous amount of leaves, pine needles, grass, and other organic debris over the frame. Aim for at least 2-3 feet of compacted debris on all sides. This creates incredible insulation, trapping your body heat.
Tree-Well Shelter: Using Nature’s Architecture
In snowy conditions, a tree-well shelter utilizes the natural cavity formed around the base of a large evergreen tree. The snow around the trunk often melts or compacts, creating a ready-made depression. Dig out any loose snow, reinforce the walls with branches if needed, and create a roof using boughs or a small tarp. This offers surprising protection from wind and cold.
More Robust Shelter Options (If Time Allows)
If you have more time and energy, these shelters offer greater protection and comfort, suitable for longer stays or harsher conditions.
A-Frame Shelter: Sturdy and Versatile
A more robust version of the lean-to, an A-frame shelter uses two opposing sides forming an ‘A’ shape. You can create this by leaning two long poles against each other, or by using a ridgepole supported by two tripods. This design offers better all-around protection from wind and rain compared to a simple lean-to. Cover it with dense materials for insulation.
Tarp Shelter Variations: Leveraging Gear
If you’re fortunate enough to have a tarp, your options expand significantly. You can create various effective shelters like a lean-to, a classic A-frame strung between two trees, or even a plow point (a triangular shape anchored at one end). Use ropes, cordage, and stakes (or heavy rocks) to secure your tarp. The key is to create tension and a good slope for water runoff.
Snow Cave/Quinzee: Winter Survival
In deep snow, a snow cave or a quinzee (a hollowed-out snow mound) provides exceptional insulation and protection from extreme cold and wind. For a quinzee, pile a large mound of snow, let it “sinter” (harden) for an hour or two, then dig out the interior. A snow cave involves digging directly into a snowdrift. Always create a ventilation hole and a sleeping platform higher than the entrance to trap warmer air.
Finishing Touches and Comfort
Once the basic structure is up, a few additions can significantly improve your chances of survival and comfort. These aren’t luxuries; they’re critical for maintaining morale and body temperature.
Creating a Comfortable Sleeping Platform
Elevate yourself off the cold, damp ground. A thick layer of dry leaves, pine boughs, grass, or even a bed of small, springy branches can provide crucial insulation from the ground, which saps body heat quickly. Aim for at least 6-8 inches of material.
Fire Placement and Ventilation
If you plan to have a fire, ensure it’s safely outside your shelter, especially for debris huts or lean-tos, which are highly flammable. For specific, well-designed shelters like snow caves or larger A-frames, a small, controlled fire might be possible inside, but only with proper ventilation to prevent carbon monoxide poisoning. Always exercise extreme caution.
Signaling for Rescue (If Applicable)
Consider how your shelter’s location might aid in signaling. A clear area nearby for a signal fire (three fires in a triangle is a universal distress signal) or a visible marker (like brightly colored fabric or a rock cairn) can be life-saving. Think about visibility from the air or a distance.
Conclusion
Building an emergency shelter in the wild is a fundamental survival skill that can make the difference between life and death. By understanding the ‘S.T.O.P.’ principle, carefully choosing your location, applying essential building principles, and knowing various shelter types, you equip yourself with the knowledge to face unexpected challenges. Remember, practice makes perfect. The more you train and experiment with these techniques in a non-emergency setting, the more confident and capable you’ll be when it truly matters. Stay prepared, stay safe, and always respect the power of the wild.