
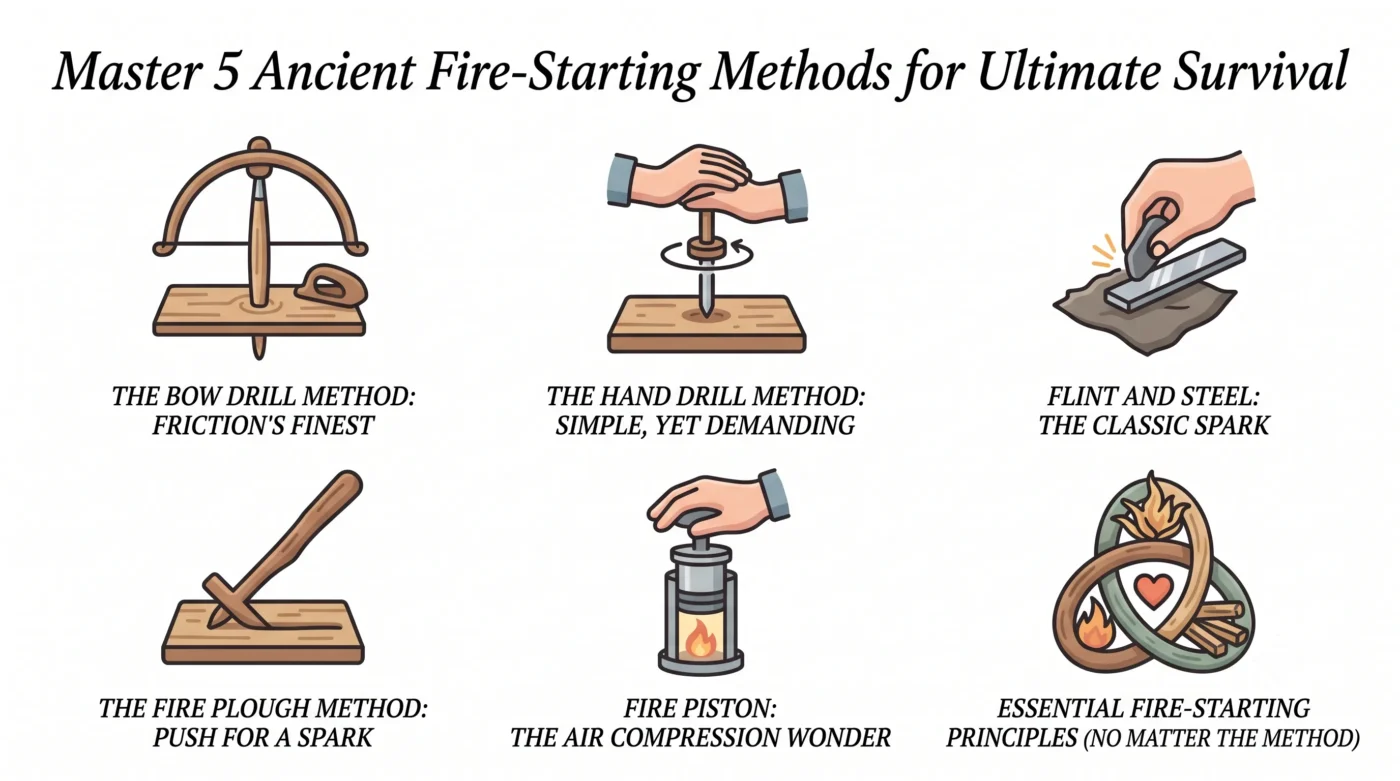
Learn 5 ancient fire-starting techniques every survivor needs. Go beyond modern tools and master the bow drill, hand drill, flint & steel, and more for true self-reliance.
Fire is more than just warmth; it’s a cornerstone of survival. It offers heat, light, protection from predators, water purification, and the ability to cook food. In a true survival scenario, your ability to create fire can be the difference between thriving and merely enduring.
While lighters and matches are convenient, they’re finite and prone to failure. Learning ancient fire-starting methods connects you to humanity’s oldest skills, providing reliable, self-sufficient ways to make fire when modern tools are gone or broken.
This guide will cover five time-tested, ancient fire-starting techniques that every serious survivor, prepper, and outdoor enthusiast should not only know about but also practice. Master these, and you’ll never be without fire again.
Why Master Ancient Fire Skills?
- True Self-Reliance: Relying on your own skills, not just gear, builds confidence and capability. You become the resource.
- Emergency Preparedness: Modern tools fail. These methods don’t run out of fuel, get wet and stop working, or break easily. They depend on your knowledge and effort.
- Deepening Your Bushcraft Knowledge: Understanding the ‘how’ and ‘why’ behind these methods enhances your overall outdoor acumen. It’s a fundamental skill that opens doors to other primitive technologies.
The Bow Drill Method: Friction’s Finest
How the Bow Drill Works
The bow drill generates intense friction between a spindle (a straight stick) and a fireboard (a flat piece of wood) to create a hot ember. The bow provides the mechanical advantage, allowing you to spin the spindle rapidly and consistently while applying downward pressure.
Essential Components You’ll Need
- Spindle: A straight, dry stick, roughly 8-12 inches long and about thumb-thick. Look for softer woods like cedar, cottonwood, or willow.
- Fireboard: A flat, dry piece of wood, ideally the same type as your spindle. It needs a small divot to hold the spindle and a V-notch cut into the side to collect the dust.
- Bow: A slightly curved stick, about arm’s length, with a strong cord (shoelace, paracord, rawhide) strung tightly between its ends.
- Handhold (Socket): A smooth, hard piece of wood, stone, or bone with a small indentation to hold the top of the spindle. This protects your hand and allows you to apply consistent downward pressure.
- Tinder Bundle: A bird’s nest-shaped collection of very fine, dry, fluffy material (e.g., cedar bark fibers, cattail fluff, fine dry grass) ready to receive the ember.
Step-by-Step Guide to Success
- Gather and Prepare: Collect all components, ensuring they are dry. Cut your V-notch into the fireboard, leading from the spindle’s divot to the edge.
- Set Up: Loop the bowstring once around the spindle. Place the bottom of the spindle into the fireboard’s divot and the top into your handhold. Brace the fireboard firmly with your foot.
- Drill: Hold the bow horizontally and saw it back and forth, spinning the spindle. Apply steady downward pressure with the handhold. You’ll see smoke and dark wood dust collecting in the V-notch.
- Create the Ember: Increase speed and pressure. The dust will darken, then begin to smoke more heavily. Keep drilling until you see a small, glowing black coal (the ember) form in the dust pile.
- Transfer and Nurture: Carefully tap the ember from the fireboard into your prepared tinder bundle. Gently cup the bundle and blow steadily and softly onto the ember. It will grow, smoke, and eventually burst into flame.
Common Mistakes and How to Avoid Them
- Wet Materials: Ensure all wood is bone dry. Damp wood won’t generate enough friction or heat.
- Wrong Wood Types: Hardwood spindles on hardwood fireboards are too difficult. Aim for a softer wood combination or a slightly harder spindle on a softer fireboard.
- Lack of Pressure/Speed: You need both. Consistent, firm downward pressure combined with rapid, smooth bow strokes is key.
- Poor Form: Keep your wrist locked, elbow tucked, and use your whole arm to saw the bow. Maintain a stable stance.
The Hand Drill Method: Simple, Yet Demanding
Understanding the Hand Drill Principle
The hand drill is the most basic friction method, relying solely on your hand pressure and speed to spin a spindle against a fireboard. It’s physically demanding but incredibly rewarding, proving you can make fire with minimal tools.
Gathering Your Materials
- Spindle: A straight, dry stick, about 18-24 inches long and pencil-thick. Again, softer woods like mullein, yucca, or cedar work best.
- Fireboard: A flat, dry piece of wood, ideally the same type as your spindle, with a small divot and a V-notch.
- Tinder Bundle: Essential for catching the small ember.
Mastering the Technique
- Preparation: Prepare your fireboard with a divot and V-notch. Have your tinder bundle ready.
- Stance: Kneel over the fireboard, bracing it with your feet. Place the spindle’s tip into the divot.
- Rotation: Place your hands at the top of the spindle, palms together. Apply firm downward pressure and rapidly rub your hands together, rolling the spindle between your palms. Work your hands down the spindle.
- Reset and Repeat: When your hands reach the bottom, quickly slide them back to the top and continue the motion. This requires practice to maintain continuous rotation and pressure.
- Ember Creation: As with the bow drill, you’re looking for a dark dust pile that begins to smoke heavily and eventually forms a glowing ember. Transfer it to your tinder bundle and blow into flame.
Tips for Building Endurance and Speed
- Practice Drills: Start with shorter spindles to get the feel, then move to longer ones. Focus on consistent pressure and speed.
- Hand Conditioning: Your hands will get sore. Build calluses over time. Some people use a small amount of sand on their palms for better grip, but this can be abrasive.
- Body Mechanics: Use your body weight to apply pressure, not just arm strength. Keep your elbows tucked in.
The Fire Plough Method: Push for a Spark
The Mechanics of the Fire Plough
The fire plough uses a stick (the plough stick) to ‘plough’ a groove in a fireboard. As you push and rub, wood dust accumulates at the end of the groove. The friction heats this dust until it forms an ember.
What to Look For in Wood
- Plough Stick: A straight, sturdy stick, about 18-24 inches long, with a somewhat pointed or rounded end. Softer woods like cedar, basswood, or cottonwood are good choices.
- Fireboard: A flat, dry piece of wood, ideally the same type as the plough stick. It needs a smooth surface for the groove.
Ploughing Your Way to an Ember
- Prepare the Fireboard: Lay the fireboard flat and stable. You might want to create a small starting indentation for your groove.
- The Motion: Hold the plough stick firmly. Place its tip on the fireboard and push it forward along a straight line, applying firm downward pressure. As you push, lift the stick slightly and pull it back to the start of the groove, then push again. This creates a continuous rubbing motion.
- Collect Dust: As you plough, wood dust will accumulate at the far end of the groove. Focus your pressure and speed to heat this dust.
- Ember Formation: Continue ploughing with increasing speed and pressure. The dust will darken and begin to smoke. Keep going until you see a small ember glowing within the pile of dust. Carefully transfer this ember to your tinder bundle and blow into flame.
Regional Variations and Adaptations
Different cultures have utilized the fire plough with slight variations. Some use a wider, flatter plough stick, while others might use a slightly angled groove. The core principle of pushing friction to generate heat remains constant, adapting to available wood types and local conditions.
Flint and Steel: The Classic Spark
The Science Behind Flint and Steel
Striking a high-carbon steel striker against a piece of flint (or chert) shaves off tiny particles of steel. The friction and impact heat these particles to ignition temperature, creating hot sparks (actually molten steel) that can ignite a prepared tinder.
Choosing the Right Striker and Chert
- Striker: You need high-carbon steel. Traditional strikers are C-shaped, but the back of a carbon steel knife, a file, or even certain types of ferro rods (though technically not flint and steel) can work. Avoid stainless steel; it won’t spark.
- Chert (Flint): Look for hard, sharp-edged rocks that produce a sharp, glassy fracture. Flint, chert, jasper, quartz, or even obsidian can work. The sharper the edge, the better it shaves steel.
Preparing Your Char Cloth or Tinder Bundle
This is the crucial step. Flint and steel sparks are hot but short-lived. They need a highly combustible tinder to catch and hold the spark.
- Char Cloth: This is the gold standard. Make it by heating cotton cloth in a sealed tin with a small hole until it’s carbonized. It catches a spark instantly and glows like a coal.
- Other Tinder: Very fine, dry punk wood, cattail fluff, or even a dried fungus like Chaga can work, but char cloth is far superior for reliability.
Striking a Spark and Nurturing the Flame
- Position: Hold the flint firmly between your thumb and forefinger, with a sharp edge exposed. Place a small piece of char cloth directly on top of this edge.
- Strike: Hold the steel striker firmly. With a quick, downward glancing blow, strike the steel against the flint’s sharp edge, aiming the sparks directly at the char cloth.
- Catch the Spark: A successful strike will send a shower of sparks. One should land on the char cloth, causing it to glow red.
- Nurture the Flame: Once the char cloth is glowing, carefully place it into your main tinder bundle. Gently cup the bundle and blow steadily and softly onto the glowing char cloth. It will expand, smoke, and eventually ignite the tinder bundle into a flame.
Fire Piston: The Air Compression Wonder
How the Fire Piston Generates Heat
The fire piston works on the principle of adiabatic compression. Rapidly compressing air in a sealed cylinder causes its temperature to rise dramatically. This sudden increase in heat is enough to ignite a small piece of tinder placed inside the piston.
What You’ll Need (and How to Improvise)
- Cylinder: A hollow tube, traditionally made from wood, bone, or horn, with one end sealed and the other open.
- Piston: A rod that fits snugly into the cylinder, with a small indentation at its end to hold tinder. It needs an airtight seal, often achieved with an O-ring or wrapped natural fibers (like waxed cotton or leather).
- Tinder: A tiny piece of highly combustible material, such as char cloth, punk wood, or a small bit of dry fungus. It must be small enough to fit into the piston’s end.
While traditional fire pistons are precision-made, in a pinch, you might improvise with a sturdy bamboo section and a tightly fitting stick, though achieving the necessary airtight seal is the biggest challenge.
The Compression Technique
- Load Tinder: Place a tiny piece of char cloth or other suitable tinder into the indentation at the end of the piston.
- Insert Piston: Insert the piston into the cylinder, ensuring the tinder is at the bottom.
- Compress: Hold the cylinder firmly. With a quick, forceful, and decisive downward thrust, push the piston all the way into the cylinder. The air inside will compress rapidly.
- Retrieve Ember: Immediately pull the piston out. The tinder at the end should be glowing red. Quickly transfer this ember to your main tinder bundle and blow it into a flame.
Advantages in Wet Conditions
The fire piston’s enclosed nature makes it less susceptible to dampness or wind, which can hinder other friction methods or spark-based techniques. As long as your tinder is dry and the piston functions, you can generate an ember even in challenging weather.
Essential Fire-Starting Principles (No Matter the Method)
The Importance of Tinder and Kindling
Getting an ember is only half the battle. You need a well-prepared fire lay to turn that ember into a sustainable flame. Always gather and prepare three stages of fuel before you even attempt to make fire:
- Tinder: Extremely fine, dry, fluffy material that catches an ember or spark easily (e.g., cattail fluff, cedar bark fibers, fine dry grass, char cloth).
- Kindling: Small twigs and sticks, pencil-lead to pencil-thick, that will catch fire from the tinder (e.g., feather sticks, small dry branches).
- Fuel Wood: Larger pieces of wood that will sustain the fire once the kindling is burning well.
Site Selection and Safety First
Always choose a safe, sheltered spot for your fire. Clear a wide area down to bare earth, removing any flammable debris. Have water or dirt readily available to extinguish your fire. Never leave a fire unattended, and always ensure it’s completely out before you leave the area.
Practice, Practice, Practice
Proficiency comes only through repeated attempts and learning from failures. Don’t expect to master these methods on your first try. Dedicate time to practice each technique in varying conditions. The more you practice, the more intuitive and reliable these skills become.
Conclusion
Mastering these ancient fire-starting methods isn’t just about survival; it’s about connecting with fundamental human ingenuity and building profound self-reliance. You’re tapping into skills that have kept humanity alive for millennia, proving your capability when modern conveniences fail.
Your next step: Don’t just read about these techniques; get out there and try them. Gather your materials, follow the steps, and experience the satisfaction of creating fire from scratch. It’s a skill that will empower you like few others.
Be prepared, be proficient. In any survival situation, the ability to make fire is a game-changer. Equip yourself with these timeless skills and ensure you’re always ready for whatever the wilderness throws your way.