
Knowing how to find water isn’t just a good skill; it’s a fundamental requirement for anyone venturing into the outdoors—be it a casual hiker, a seasoned camper, or a prepared prepper. Relying solely on what you carry is a gamble you don’t want to take.
This article lays out 8 practical, proven methods to locate and collect water in various wilderness environments. We’ll cover everything from reading the landscape to tapping into plant life, ensuring you’re equipped with the knowledge to secure this essential resource when it matters most.
The Absolute Basics: Water Search Principles
Before you even start actively searching, a few core principles will guide your efforts and increase your chances of success.
Prioritize Safety and Conserve Energy
When you’re low on water, your energy levels will drop quickly. Don’t exhaust yourself on a frantic, aimless search. Use smart, efficient methods that align with your current energy levels. If you have any water left, even small sips, ration it to maintain cognitive function. A clear head is your best tool in a survival situation.
Always Be Looking: Passive Observation
Make it a habit to constantly scan your surroundings for subtle signs of water, even when you’re focused on other tasks like setting up camp or foraging. Understand the ‘water cycle’ of an area: where water collects, how it flows, and where it might evaporate. Look for patterns, changes in vegetation, and depressions in the terrain. Your eyes are your first and best water detector.
Reading the Landscape and Animal Signs
Nature often leaves clear clues for those who know how to interpret them.
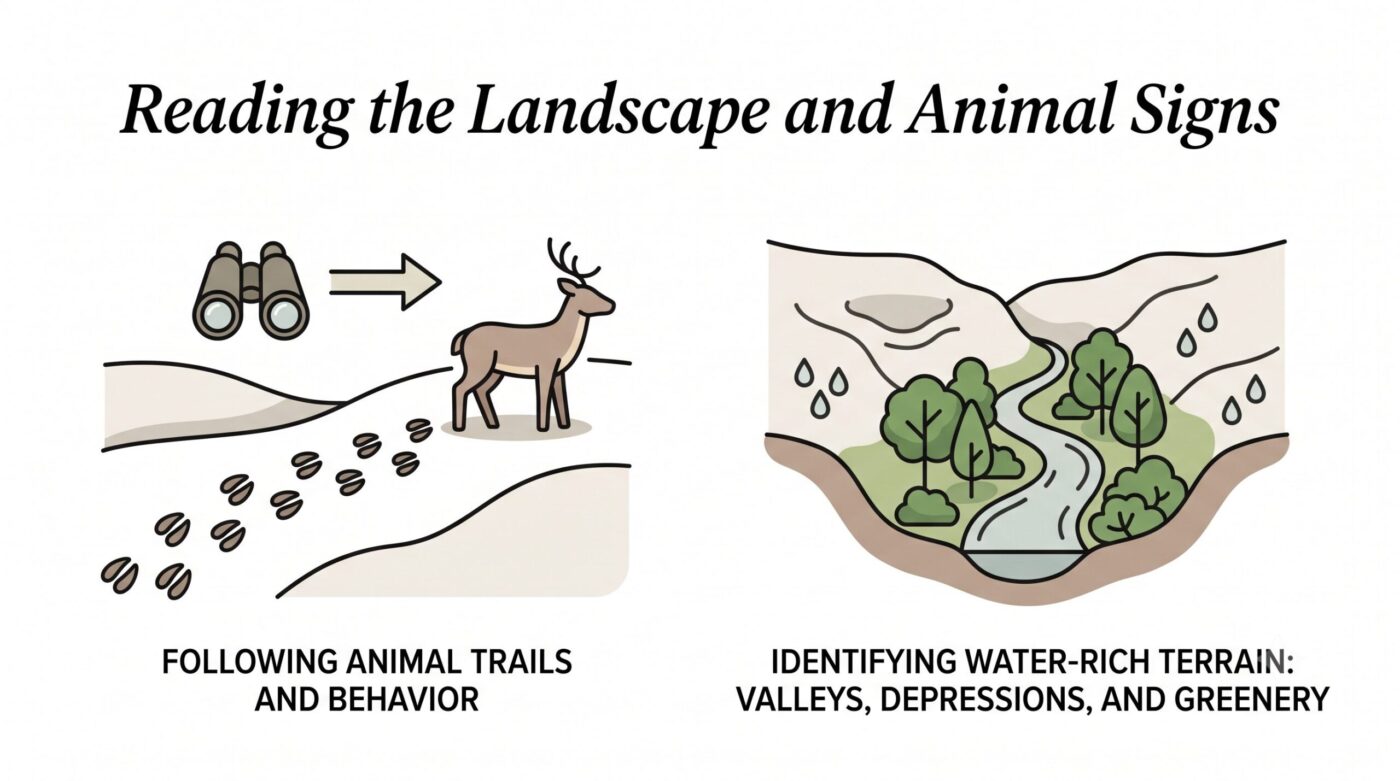
Following Animal Trails and Behavior (Method 1)
Animals, especially in arid regions, are experts at finding water. Their trails often converge and lead directly to a water source. Look for well-worn paths that seem to be heading downhill or into a valley. Observing birds, particularly pigeons, finches, and waterfowl, can also be incredibly helpful. They often fly in a straight line to water at dawn and dusk. Similarly, insects like bees and ants will often have established flight paths or trails leading to water. At night, listen for frogs, crickets, or other water-dependent creatures; their calls are a strong indicator of nearby moisture.
Identifying Water-Rich Terrain: Valleys, Depressions, and Greenery (Method 2)
Water naturally seeks the lowest point. Search for low-lying areas, ravines, gullies, and natural depressions where water naturally collects or flows underground. Look for lush, green vegetation—especially willows, reeds, cattails, and ferns—in otherwise dry areas. These plants are thirsty and indicate subsurface water, even if you don’t see it on the surface. Understanding how the ‘water table’ influences surface water availability in different terrains will help you predict where water might be found, even if it’s just below the surface.
Collecting Water from the Atmosphere
Sometimes, the best source of water is literally in the air around you.
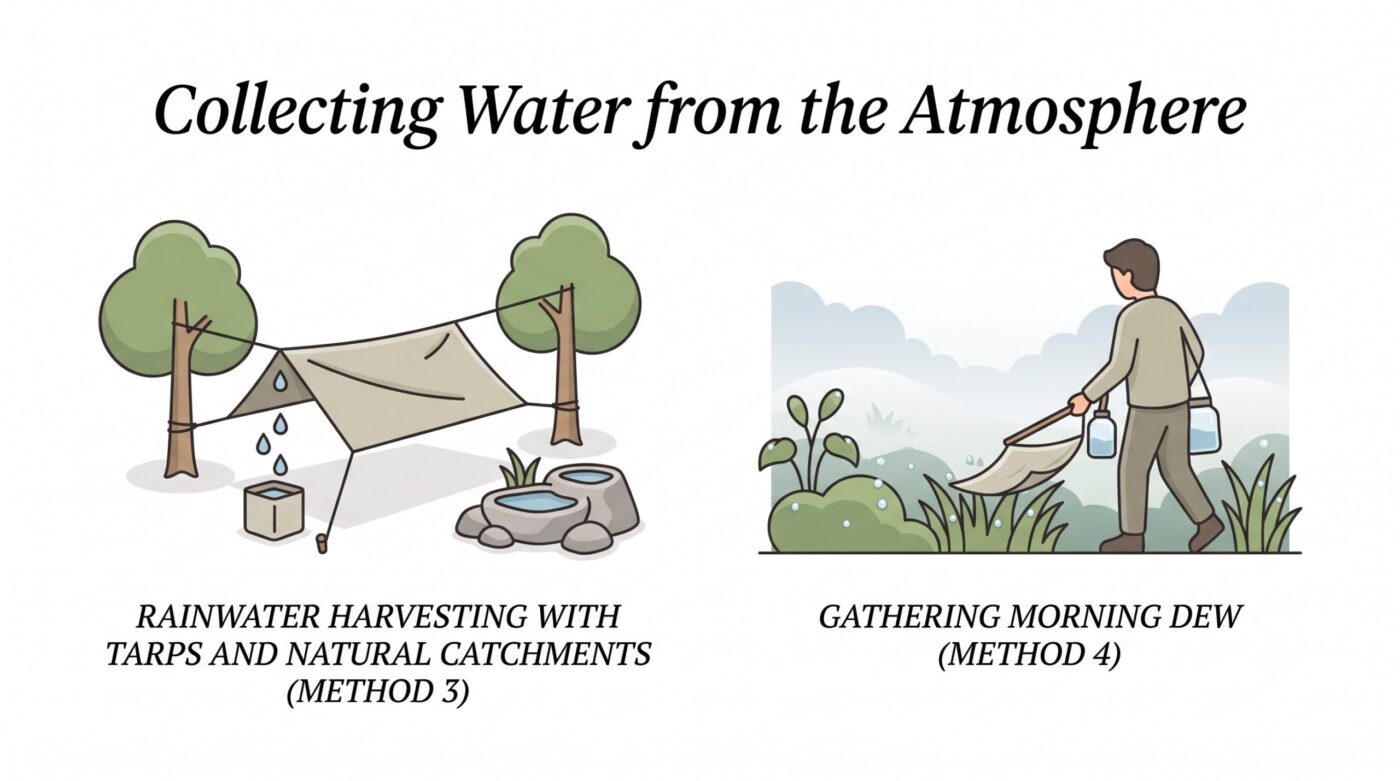
Rainwater Harvesting with Tarps and Natural Catchments (Method 3)
If rain is in the forecast, or even if it’s just a light drizzle, be ready to collect it. Set up a tarp, poncho, or any large piece of plastic to create a funnel. Angle it so the water runs down to a low point, where you can place a container to collect it. You can also use natural depressions in rocks, large leaves (like those of a banana plant), or tree hollows as temporary catchments during a storm. To maximize collection, ensure your tarp is taut and angled correctly. Keep collected water as clean as possible by avoiding contact with dirty surfaces.
Gathering Morning Dew (Method 4)
In many environments, particularly open, grassy areas, morning dew can provide a surprising amount of water. In the early morning, before the sun gets too high, use an absorbent cloth—a bandana, shirt, or sponge—to wipe dew from grass, leaves, and other surfaces. Once saturated, wring the cloth into a container. Repeat this process until you’ve collected a usable amount. This method is most effective on clear, cool nights followed by sunny mornings.
Ground-Level Extraction Techniques
When surface water is scarce, you might need to dig a little deeper.
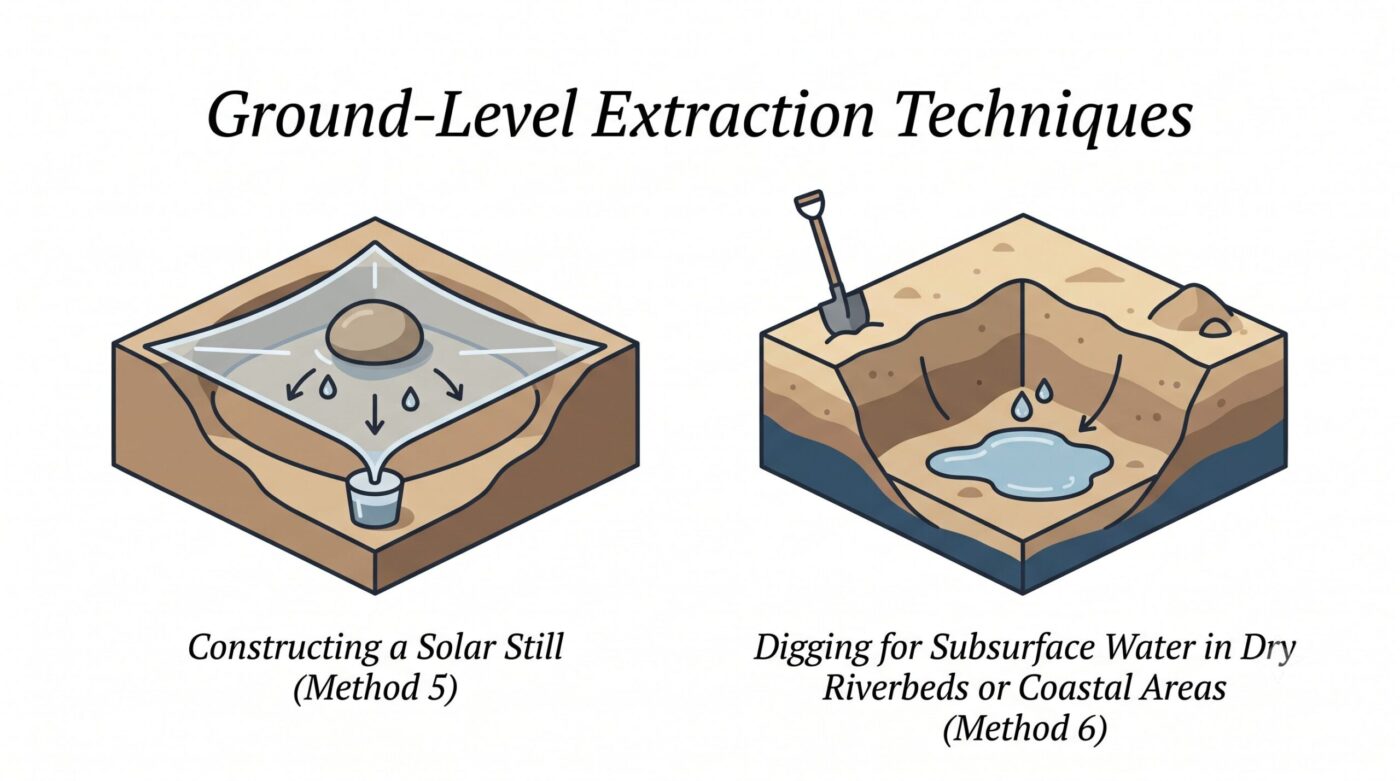
Constructing a Solar Still (Method 5)
A solar still is a slow but reliable method for extracting water from the ground or even from plants. Here’s how to build a basic one:
- Dig a pit: Dig a hole about 3 feet wide and 2 feet deep in a sunny spot.
- Place a container: Put a collection container (cup, bowl, canteen) in the center of the pit.
- Add moisture (optional): If you have green leaves or damp soil, place them around the container in the pit to increase moisture.
- Cover with plastic: Lay a clear plastic sheet (poncho, trash bag) over the pit, covering the entire opening.
- Anchor the edges: Secure the edges of the plastic with rocks or soil to create an airtight seal.
- Create a drip point: Place a small rock or weight in the center of the plastic, directly above your collection container, to create a downward cone shape.
How it works: The sun heats the ground and any moisture in the pit, causing it to evaporate. The water vapor rises, condenses on the cooler plastic sheet, and then drips down the cone into your container. It’s a slow process, yielding only a few ounces to a quart per day, but it’s consistent in sunny conditions.
Digging for Subsurface Water in Dry Riverbeds or Coastal Areas (Method 6)
Even if a riverbed is dry on the surface, water often flows just beneath. Look for bends in dry riverbeds, washes, or low points where water might flow underground. Dig a ‘seep well’—a small hole about 1-3 feet deep. Allow water to filter in from the surrounding soil. It might be muddy at first, but it should clear up. For coastal areas, dig above the high tide line in depressions behind dunes. The sand acts as a natural filter, and you can often find fresher water floating on top of the denser saltwater.
Tapping into Plant Life
Plants are natural water pumps, and you can sometimes tap into their reserves.
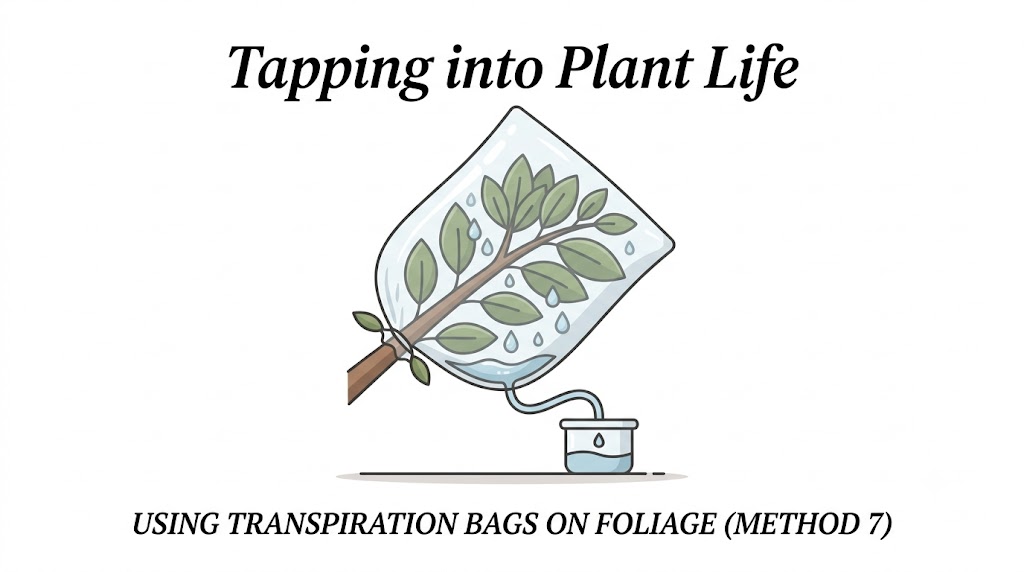
Using Transpiration Bags on Foliage (Method 7)
This method leverages a plant’s natural process of transpiration (releasing water vapor). Find a leafy, non-poisonous branch (avoiding plants with milky sap, thorns, or berries you don’t recognize). Tie a clear plastic bag tightly around the branch, sealing the opening. As the sun warms the leaves, they release water vapor, which condenses inside the bag, dripping down to the lowest point. You can then snip a corner of the bag to collect the water. This works best on broad-leafed plants in sunny conditions. Crucial safety precaution: only use plants you are absolutely certain are non-poisonous. When in doubt, don’t use it.
Safely Utilizing Frozen Water Sources
In cold environments, snow and ice are abundant, but they require careful handling.
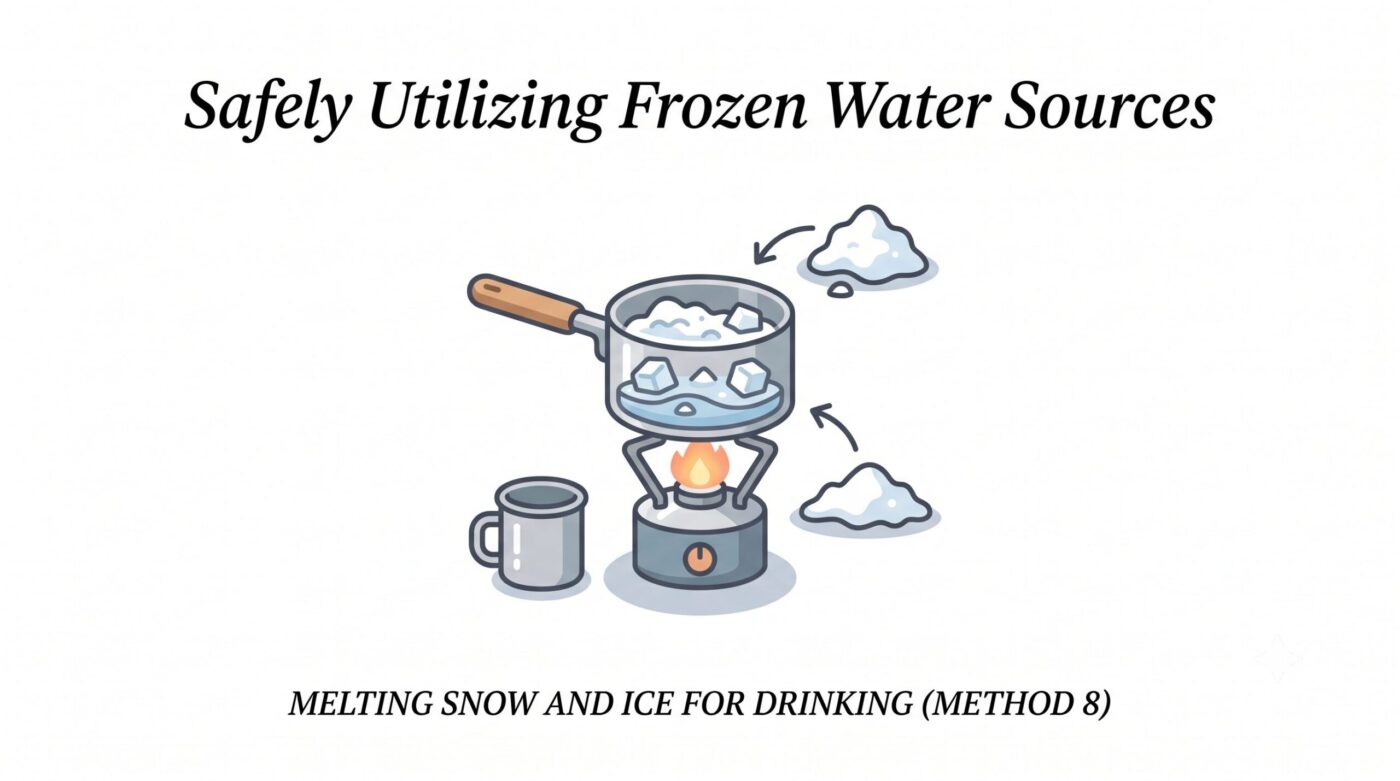
Melting Snow and Ice for Drinking (Method 8)
Never eat snow directly to hydrate. It’s dangerous because it rapidly lowers your core body temperature, increasing the risk of hypothermia and actually dehydrating you as your body expends energy to warm it. Always melt snow and ice before drinking. Use a heat source like a fire or stove. If you have no heat source, you can melt small amounts in a container against your body or in direct sunlight. Start with a small amount of water in your pot before adding snow; this prevents scorching the pot and speeds up the melting process. Add snow gradually to avoid cooling the water too much. Avoid yellow or discolored snow, as it may be contaminated.
Crucial Next Steps: Water Purification
Finding water is only half the battle. Making it safe to drink is equally, if not more, important.
Why Purification is Non-Negotiable
Untreated water, even if it looks crystal clear, can harbor a host of dangerous microorganisms: bacteria, viruses, and parasites. These contaminants can cause severe illness, leading to vomiting, diarrhea, and further dehydration—the last thing you need in a survival situation. Always assume any wild water source is contaminated and purify it.
Common Purification Methods: Boiling, Filters, Chemical Treatments
- Boiling: This is the most effective and reliable method for killing virtually all pathogens (bacteria, viruses, and parasites). Bring water to a rolling boil for at least one minute (three minutes at altitudes above 6,500 feet). Let it cool before drinking.
- Portable Water Filters: Many excellent portable filters are available that can remove bacteria and protozoa (like Giardia and Cryptosporidium). Always check your filter’s specifications; some do not remove viruses.
- Chemical Treatments: Iodine or chlorine dioxide tablets are lightweight and effective for disinfecting water. Follow the manufacturer’s instructions carefully regarding dosage and wait times. These are generally effective against bacteria and viruses, but some may not kill all parasites.
Conclusion
Water is paramount in any survival scenario. The 8 proven methods discussed here—from reading animal signs and terrain to constructing a solar still and melting snow—offer a versatile toolkit for securing this life-sustaining resource. Remember, finding water is a skill that improves with practice.
I encourage you to learn and practice these techniques in a safe, controlled environment before an actual emergency arises. Your preparedness could be the difference between struggle and survival. Stay prepared, stay safe, and never underestimate the power of knowledge and practical skills when facing the challenges of the wild.