
Getting lost in the wild? Ugh, just thinking about it can send shivers down your spine, right? It’s a scary feeling, and honestly, it happens faster than you’d ever think, even to folks who know the outdoors well. One moment you’re enjoying a peaceful hike, and the next… poof. You don’t recognize anything. That familiar trail has vanished, and a cold knot forms in your stomach.
Here’s the real talk: the first two hours after you realize you’re lost are, without exaggeration, the most important. What you do in those initial 120 minutes can literally change everything. This guide isn’t here to scare you; it’s here to empower you. We’ll walk through exactly what to do right away to stay safe and boost your chances of getting found. What’s the very first thing you should do when that “uh oh” moment hits? How do you keep yourself together when fear starts to grow? The short answer: those first 120 minutes are all about staying calm, making smart choices, and getting yourself ready for help to arrive. It’s your lifeline.
What Happens When You Realize You’re Lost?
Okay, let’s get real about that initial gut punch. When it dawns on you that you’re truly lost, the first feeling is often shock, quickly followed by fear. Your mind might race, conjuring up worst-case scenarios. You’ll likely feel a powerful urge to just move, to run, to retrace your steps frantically, or to pick any direction and just go. This is a natural, primal response. Adrenaline pumps, preparing you for fight or flight, making rational thinking tough. You might even feel a bit disoriented, like the world has shifted.
But here’s the crucial part: this is precisely the time to stop. Seriously, just stop. Don’t give in to the urge to bolt or wander aimlessly. That initial panic, while understandable, is your biggest enemy. Moving without a clear plan, especially when disoriented, often leads to getting more lost, making it harder for searchers, and potentially putting you in more danger. Instead, take a deep breath. Acknowledge the fear, but don’t let it drive your actions. Your immediate goal isn’t to find your way out; it’s to stop the situation from getting worse and regain control. By stopping, you give yourself a chance to process, calm your thoughts, and start thinking clearly. It’s the first, most vital step.
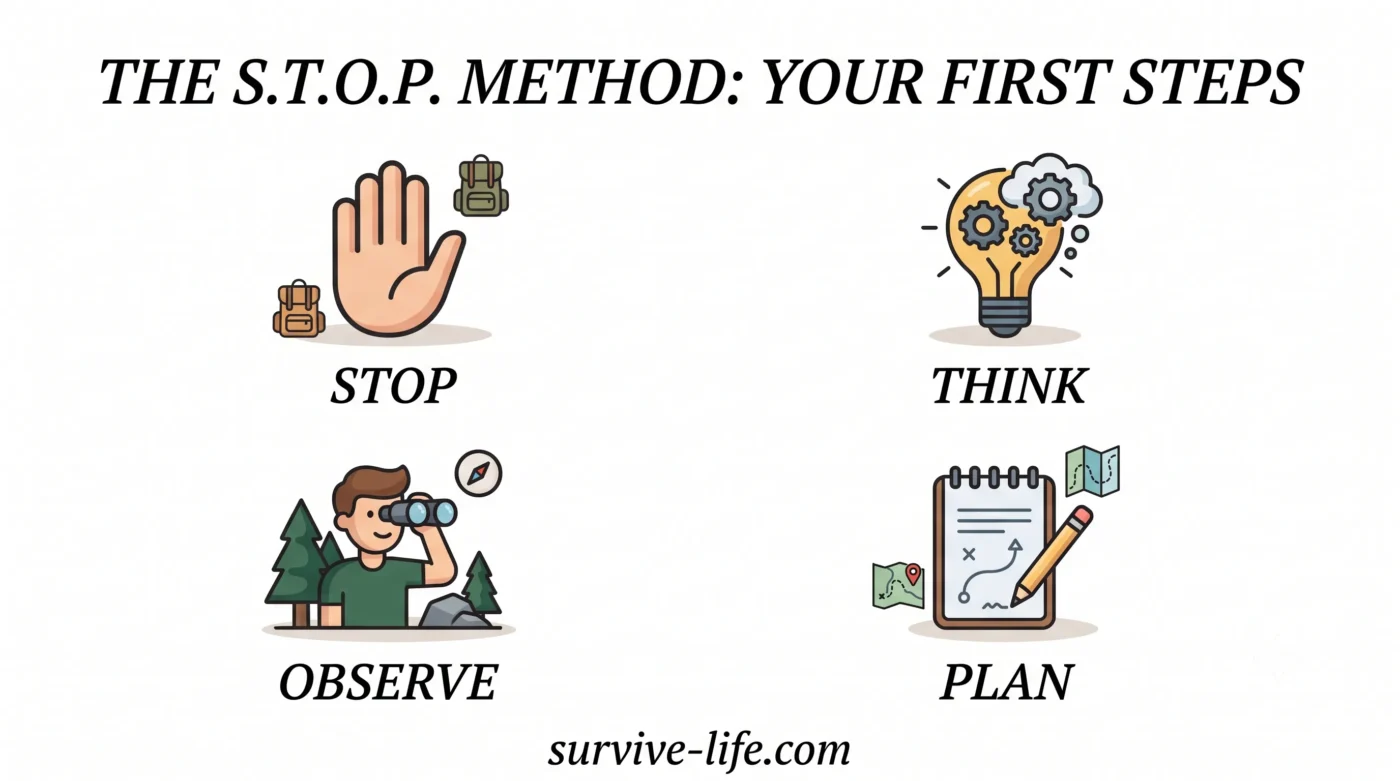
The S.T.O.P. Method: Your First Steps
Alright, you’ve stopped. Now what? The S.T.O.P. method is your best friend here. It’s a simple, powerful framework to help you calm down and make smart choices instead of bad ones. Let’s break it down.
Stop
This means stopping everything: walking, panicking, making assumptions. Find a safe spot right where you are – lean against a tree, sit on a rock, or just stand still.
Take a few slow, deep breaths. Focus on your breathing. This helps lower your heart rate and calm your nervous system, regaining emotional control.
Remember, the wilderness isn’t going anywhere, and neither should you, not yet. This initial “Stop” is the foundation for everything that follows.
Think
Once calmer, engage your brain. Think about what happened. When did you last know where you were? What did the trail look like then?
Did you pass any unique landmarks – a specific tree, rock, or stream? Try to recall your direction. Did you see the sun or distinct shadows?
Think about your gear: what’s in your backpack? Map? Compass? Phone with signal? Focus on “what do I know right now?”
Observe
Now, really look around you. What do you see? Are there any signs of a trail, even faint? Any sounds – a distant road, a river?
Look for natural indicators: the sun’s direction, animal trails that might lead to water or open areas. Pay attention to the wind.
Look up at the sky – is a storm brewing? The more information you gather from your immediate environment, the better equipped you’ll be.
Plan
Based on your thinking and observing, make a plan. This isn’t about finding your way out immediately; it’s for the next few hours.
Your primary goal should be to stay put and make yourself visible and audible. If unsure, staying put is often best.
Plan to build a small, visible signal or conserve energy. Decide on a course of action that prioritizes safety and visibility over frantic movement.
Making Yourself Seen and Heard
You’ve S.T.O.P.ped and made a plan. Great! Now, your next big goal is to let others know you’re there. This means using your voice and anything you have to signal for help. Don’t be shy; this isn’t the time for subtlety.
Shouting for Help
Your voice is your most immediate tool. If you think someone might be within earshot – other hikers, a search party – start shouting. The universal distress signal is three of anything. So, three loud shouts, a pause, then three more. Repeat this pattern. Don’t just yell “Help!” aimlessly; make it a distinct, rhythmic signal. Yell as loud as you can, but try to conserve your voice. Listen carefully after each set of shouts for a response. If you have a whistle, use it! Three short, sharp blasts are much more effective and carry further than your voice, saving your vocal cords.
Using What You Have
Look at your gear. What’s bright or reflective? If you’re wearing a brightly colored jacket, take it off and hang it on a tree branch where it can be seen from above or a distance. If you have a space blanket, unfold it and lay it out in an open area. Its reflective side can catch the sun and be seen from far away. Even a shiny piece of aluminum foil from a snack wrapper can be a makeshift signal mirror if you catch the sun just right. If you have a flashlight, especially at night, use it to signal: three flashes, a pause, three flashes – that universal distress signal. Try to find an open area, like a clearing or a ridge, where you’ll be more visible to search planes or ground teams. Don’t wander too far from your S.T.O.P. spot, just enough to improve visibility.
Basic Needs: Shelter and Water (If You Must)
Even if you think help is coming quickly, it’s smart to think ahead. Preparing for basic needs like shelter and water can keep you safe if help takes longer. It’s about being prepared, not panicking.
First, think about shelter. You don’t need a fancy cabin, but finding a safe, relatively dry spot to wait is crucial. Look for natural shelters like a large, dense evergreen tree for rain/wind protection, or a rock overhang (careful of unstable rocks!). The goal is to get out of the elements and conserve body heat. If you have a tarp, large trash bag, or space blanket, rig a simple lean-to. Find sturdy branches, drape your material, and secure it. This simple act makes a huge difference in keeping you warm and dry, especially as evening approaches or if weather turns.
Next, water. This is big, but be super careful. Don’t wander off on a wild goose chase for water if you’re already lost; your priority is staying put. However, if you’re near a visible water source like a stream or pond, and you can purify it (filter, tablets, or boiling if you have fire tools), then consider it. Without purification, untreated water can make you sick, which you absolutely don’t need. In the short term (hours to a day), dehydration is less of a threat than exposure or getting more lost. So, only seek water if it’s safe, accessible, and potable without expending too much energy or risking getting further off track. Ration any water you have.
What Not to Do When You’re Lost
Just as important as knowing what to do is knowing what not to do. Some actions, driven by panic, can make your situation much worse. Let’s get real about these common mistakes so you can avoid them.
First, do not, under any circumstances, run in a panic. Resist that initial urge to bolt. Running aimlessly will exhaust you, potentially lead to injury, and push you further from your last known location or search paths. When disoriented, your sense of direction is often unreliable. What feels like “straight ahead” could be a wide circle, or worse, into dangerous terrain. Staying put, as we’ve emphasized, is almost always the best strategy, especially in those critical first two hours. Also, don’t abandon your backpack or any gear. Even if it feels heavy, your backpack contains vital tools, water, and potentially food crucial for survival. It’s your mobile survival kit; keep it with you.
Another big no-no is walking aimlessly, hoping to stumble upon something familiar. This is a direct path to getting even more lost and making it incredibly difficult for search and rescue teams to track you. Every step you take away from your last known position or the point you realized you were lost makes the search area exponentially larger. Don’t try to “bushwhack” through dense vegetation or difficult terrain unless you have a very clear, short-distance objective. Stick to what seems like the path of least resistance, or better yet, stay put. Your goal isn’t to be a hero; it’s to be found safe.
Conclusion
So, there you have it. Those first two hours when you’re lost in the wild are incredibly important. By staying calm, using the S.T.O.P. method – Stop, Think, Observe, Plan – signaling for help, and wisely avoiding common panic-driven mistakes, you dramatically increase your chance of being found safe and sound. Remember, being prepared is always key. Always tell someone where you’re going. If you ever find yourself lost, use these first two hours wisely. Your calm actions can save your life.