
Learn to construct a life-saving DIY water filter using only natural materials found in the wilderness. This guide covers gathering supplies, step-by-step assembly, and crucial safety warnings for making water safer to drink in an emergency.
Imagine being deep in the wilderness, far from civilization, and your water supply runs out. Or perhaps a natural disaster has compromised your usual water sources. Access to clean, safe drinking water is paramount for survival, but finding it can be a challenge. Learning to build a DIY water filter from natural materials is a vital survival skill that can literally save your life. This guide will walk you through the simple, yet effective, process of constructing a basic gravity-fed filter using items you can find in almost any natural environment. Remember, while this filter can remove sediment and some larger contaminants, it’s not a purifier. Boiling or chemical treatment is still recommended for true purification.
Why Learn to Build a Natural Water Filter?
Knowing how to improvise a water filter isn’t just a party trick; it’s a fundamental aspect of survival. Here’s why you should add this skill to your repertoire:
Essential Survival Skill
Your body needs water to function. Dehydration can set in quickly, impairing judgment and physical ability, which are critical in a survival situation. A natural water filter provides a first line of defense against visible contaminants, making otherwise undrinkable water at least somewhat safer to consume after further treatment. It buys you time and can prevent immediate illness from consuming heavily sedimented water.
Emergency Preparedness
Survival isn’t just about getting lost in the woods. Natural disasters like floods, earthquakes, or power outages can disrupt municipal water supplies. Having the knowledge to create a filter from what’s around you means you’re not solely reliant on bottled water or external aid. It’s a practical skill for any emergency kit.
Understanding Water Contamination
Building a filter helps you understand what makes water unsafe. You’ll see how different layers tackle various types of impurities, from large debris to fine silt. This practical experience builds a deeper appreciation for the challenges of water safety and the importance of proper purification.
Self-Reliance in the Outdoors
There’s a deep satisfaction that comes from knowing you can meet your basic needs using only what nature provides. This skill fosters self-reliance, boosts confidence, and reduces anxiety when you’re in an unfamiliar or challenging environment. You’re not just surviving; you’re thriving by adapting.
Gathering Your Natural Materials
Before you start building, you need to gather your components. Look for these items in your surroundings:
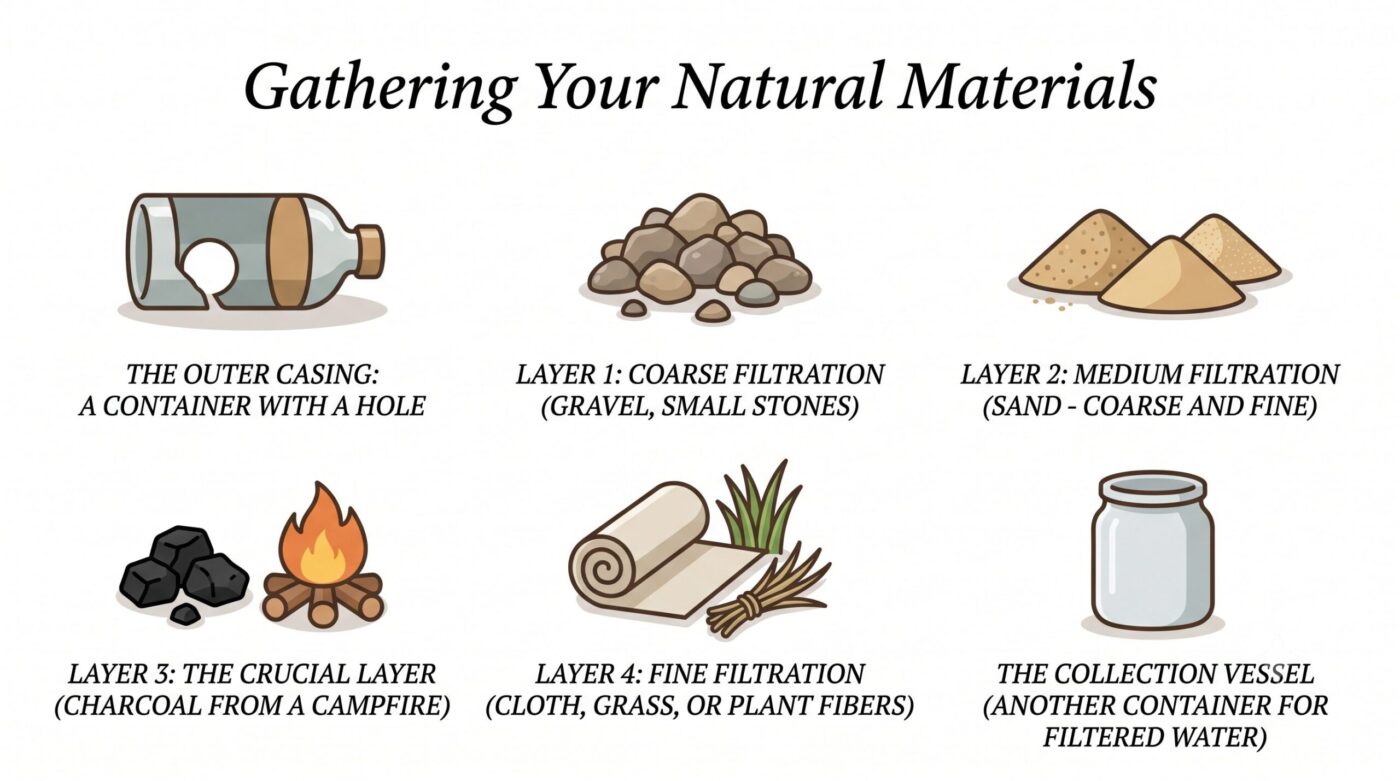
The Outer Casing: A Container with a Hole
This is the structure that holds all your filter layers. You need something that can hold water and has a way for filtered water to drip out the bottom. A plastic bottle (cut the bottom off for the top opening, and poke a small hole in the cap for the bottom) is ideal if you have one. Otherwise, look for a hollow log, a large piece of bark rolled into a cone, or even a sturdy, large leaf folded and secured. The key is a funnel shape or a container that can be inverted with a small exit point.
Layer 1: Coarse Filtration (Gravel, small stones)
Collect a handful of small, clean stones or gravel, roughly pea-sized to marble-sized. These will form the bottom-most layer (closest to the exit hole) and are crucial for stopping larger debris and supporting the layers above them.
Layer 2: Medium Filtration (Sand – coarse and fine)
You’ll need two types of sand if possible: a coarser sand and a finer sand. Coarse sand (like playground sand) will go above the gravel, and fine sand (like beach sand or riverbed silt) will go above that. Sand is excellent at trapping smaller particles and sediment. Try to find sand that isn’t mixed with too much organic matter.
Layer 3: The Crucial Layer (Charcoal from a campfire)
This is the workhorse of your natural filter. Find charcoal from a recently extinguished campfire. It needs to be black, brittle, and not ash. Break it into small pieces, roughly the size of your fingernail or smaller. Charcoal’s porous structure makes it excellent at adsorbing impurities, odors, and some toxins.
Layer 4: Fine Filtration (Cloth, grass, or plant fibers)
You’ll need a piece of clean cloth (a bandana, shirt scrap), or if you don’t have that, tightly packed layers of clean grass, moss, or fibrous plant material. This layer goes at the very top, where you pour the dirty water, and also at the very bottom, just above the exit hole, to prevent your filter media from washing out.
The Collection Vessel (Another container for filtered water)
You’ll need a separate, clean container to catch the water that drips out of your filter. This could be another bottle, a cup, a clean pot, or even a large leaf cupped to hold water.
Step-by-Step Assembly of Your Filter
With your materials gathered, it’s time to build. Remember, the layers are stacked from coarse to fine, with the finest material at the top where the dirty water enters, and the coarsest at the bottom, supporting everything.
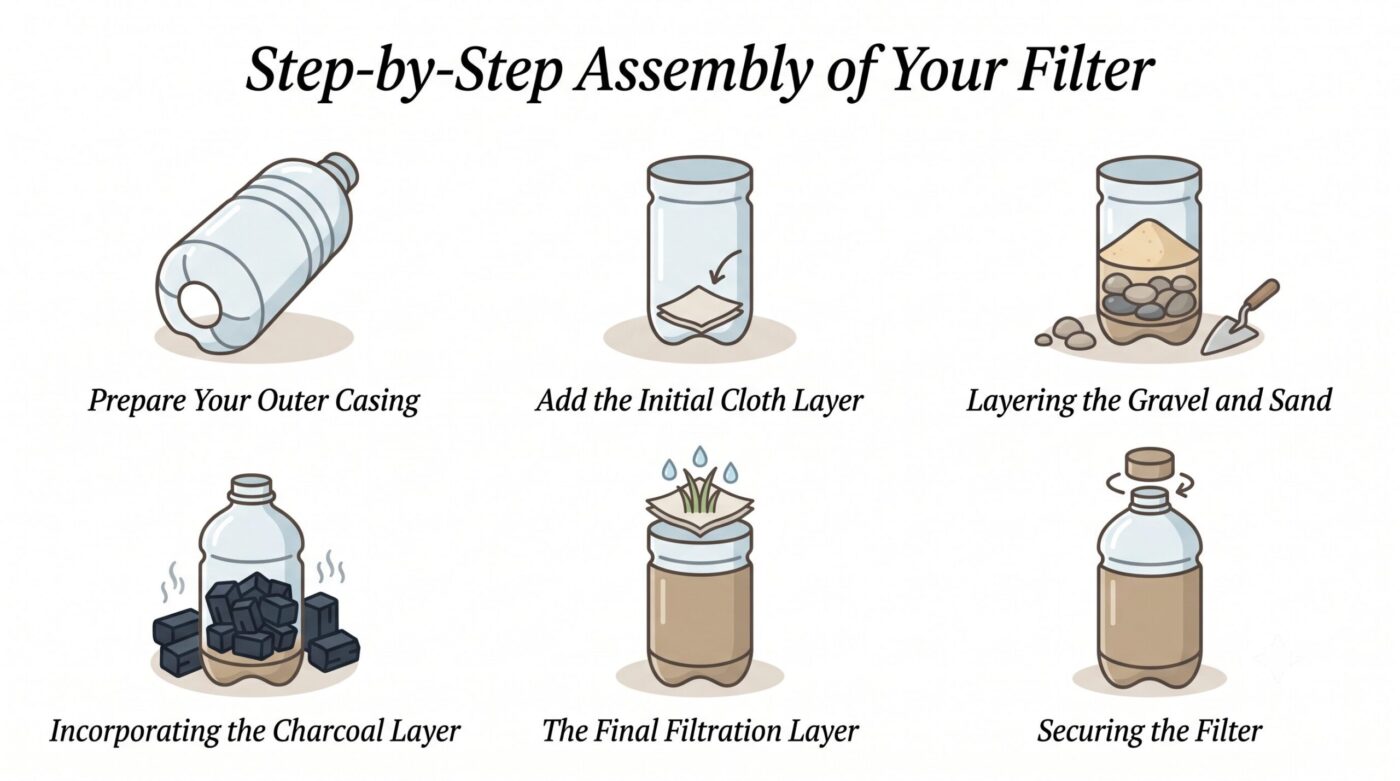
Prepare Your Outer Casing
If you’re using a plastic bottle, cut off the bottom (the wider end) so you have a large opening. Invert the bottle so the cap is at the bottom. Make sure there’s a small hole in the cap for water to drip through. If using a hollow log or bark cone, ensure it’s stable and has a small opening at the bottom.
Add the Initial Cloth Layer
Place a piece of clean cloth or a thick layer of grass/moss directly over the exit hole at the bottom of your casing. This prevents your filter media from falling out and provides a base for the layers above.
Layering the Gravel and Sand
Next, add a layer of your coarse gravel, about 2-3 inches thick, on top of the cloth. This provides drainage and support. Then, add a layer of coarse sand, about 3-4 inches thick, followed by a layer of fine sand, another 3-4 inches thick. Gently tamp down each layer to ensure it’s compact but not so tight that water can’t pass through.
Incorporating the Charcoal Layer
On top of your fine sand, add a substantial layer of crushed charcoal, ideally 2-4 inches thick. This is your primary purification layer. Spread it evenly across the sand.
The Final Filtration Layer
Finally, place another layer of fine sand (1-2 inches) on top of the charcoal, followed by a final layer of clean cloth, grass, or plant fibers. This top layer will catch the largest debris as you pour in your dirty water, protecting the finer layers below.
Securing the Filter
Position your assembled filter securely over your collection vessel. You might need to prop it up with sticks or rocks to ensure stability and allow space for the filtered water to drip freely.
How Your Natural Water Filter Works
Understanding the mechanics helps you appreciate its effectiveness and limitations.
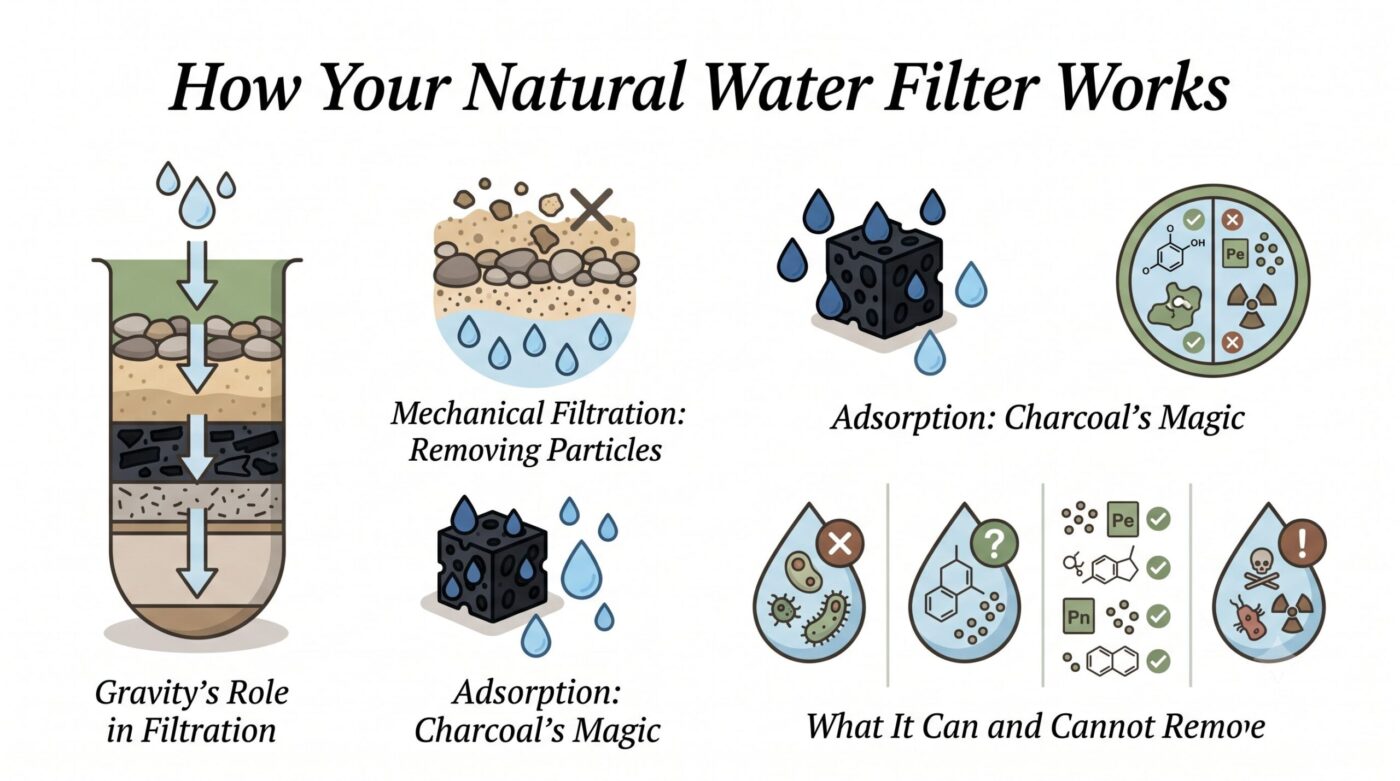
Gravity’s Role in Filtration
Your filter is gravity-fed. Water slowly seeps down through the layers, pulled by gravity. This slow passage allows time for the different materials to do their work, rather than rushing through and carrying contaminants with it.
Mechanical Filtration: Removing Particles
As water passes through the progressively finer layers of gravel and sand, larger particles, sediment, and debris get physically trapped. The spaces between the grains become smaller and smaller, effectively straining out visible impurities. The top cloth layer catches the biggest bits, protecting the finer layers below.
Adsorption: Charcoal’s Magic
The charcoal layer is where a process called adsorption happens. Activated charcoal has a highly porous surface with a massive internal surface area. As water flows over it, organic compounds, odors, and some dissolved chemicals stick to the charcoal’s surface. This significantly improves the water’s taste and clarity, and removes some toxins.
What It Can and Cannot Remove
This filter excels at removing visible sediment, dirt, leaves, and some larger suspended particles. The charcoal helps with odors, tastes, and some dissolved organic matter. However, it cannot remove microscopic bacteria, viruses, parasites, or most chemical contaminants. It’s a mechanical and adsorptive filter, not a sterilizer.
Testing, Using, and Improving Your Filter
Once assembled, your filter needs a test run.
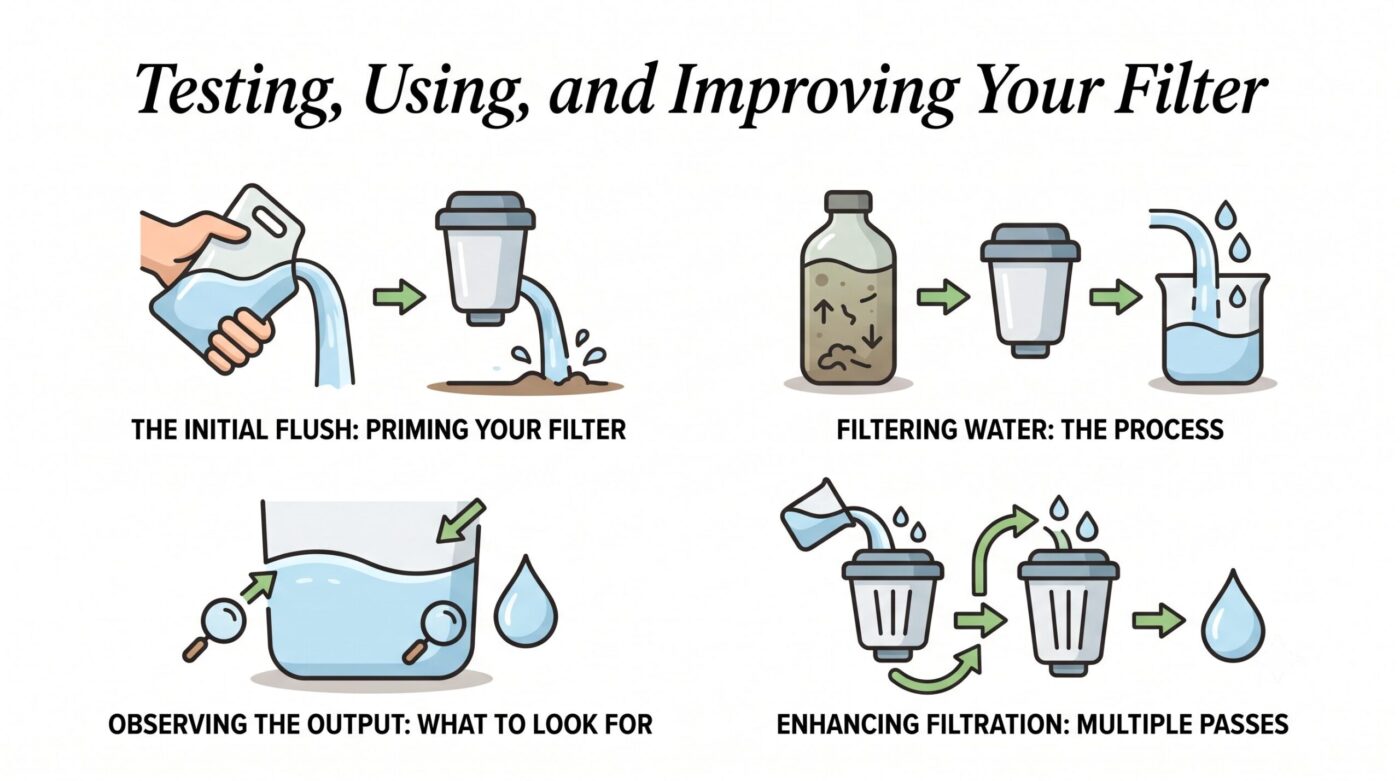
The Initial Flush: Priming Your Filter
Before drinking any water, pour a few liters of dirty water through your new filter. The first few drips will likely be cloudy or discolored as fine particles from your filter media wash out. Continue flushing until the water coming out is visibly clearer. This primes the filter and cleans out loose debris.
Filtering Water: The Process
Slowly pour your dirty water into the top of the filter. Don’t dump it all at once; let it slowly percolate through the layers. Patience is key here; the slower the water passes, the more effective the filtration will be. It can take a significant amount of time to filter even a small amount of water.
Observing the Output: What to Look For
Watch the water dripping into your collection vessel. It should be noticeably clearer than the water you poured in. It might still have a slight tint, but it should be free of visible particles. If it’s still very cloudy, your layers might be too loose, or you might need to flush it more.
Enhancing Filtration: Multiple Passes
For even better clarity, you can run the filtered water through the same filter multiple times. Each pass will remove more of the remaining fine particles. You can also build a second, identical filter and run the water through both in sequence for improved results.
Important Limitations and Water Safety Warnings
This is the most critical section. Understand these points thoroughly.
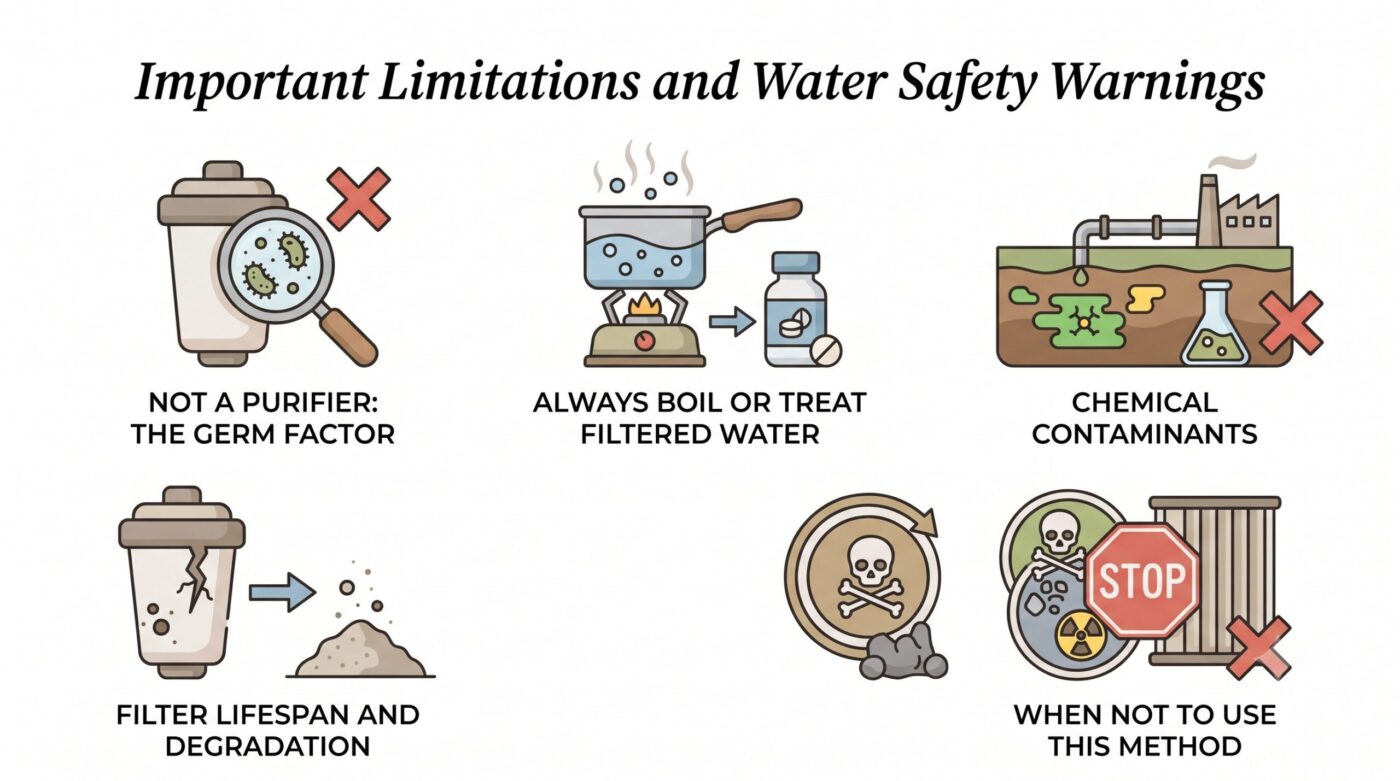
Not a Purifier: The Germ Factor
Your natural filter is NOT a water purifier. It does not remove bacteria, viruses, or most parasites, which are the primary causes of waterborne illnesses. While the water may look clean, it can still be teeming with harmful microorganisms.
Always Boil or Treat Filtered Water
After filtering, you MUST boil the water for at least one minute (three minutes at altitudes above 6,500 feet/2,000 meters) to kill bacteria, viruses, and parasites. If boiling isn’t an option, use chemical purification tablets (iodine or chlorine dioxide) or a UV light purifier. Filtration is the first step; purification is the second, non-negotiable step.
Chemical Contaminants
This type of filter is generally ineffective against dissolved chemical contaminants like pesticides, heavy metals, or industrial pollutants. If you suspect chemical contamination, do not drink the water, even after filtering and boiling.
Filter Lifespan and Degradation
Natural filters are temporary solutions. The charcoal will eventually become saturated and lose its adsorptive properties. The sand and gravel can become clogged. Expect to replace or clean your filter layers regularly, especially with heavy use.
When NOT to Use This Method
Avoid using this filter if the water source is visibly contaminated with chemicals (e.g., an oily sheen, strong chemical odor), or if it’s from a known hazardous waste site. In such cases, finding an alternative water source is your only safe option.
Maintenance and Responsible Disposal
Even a natural filter requires some attention.
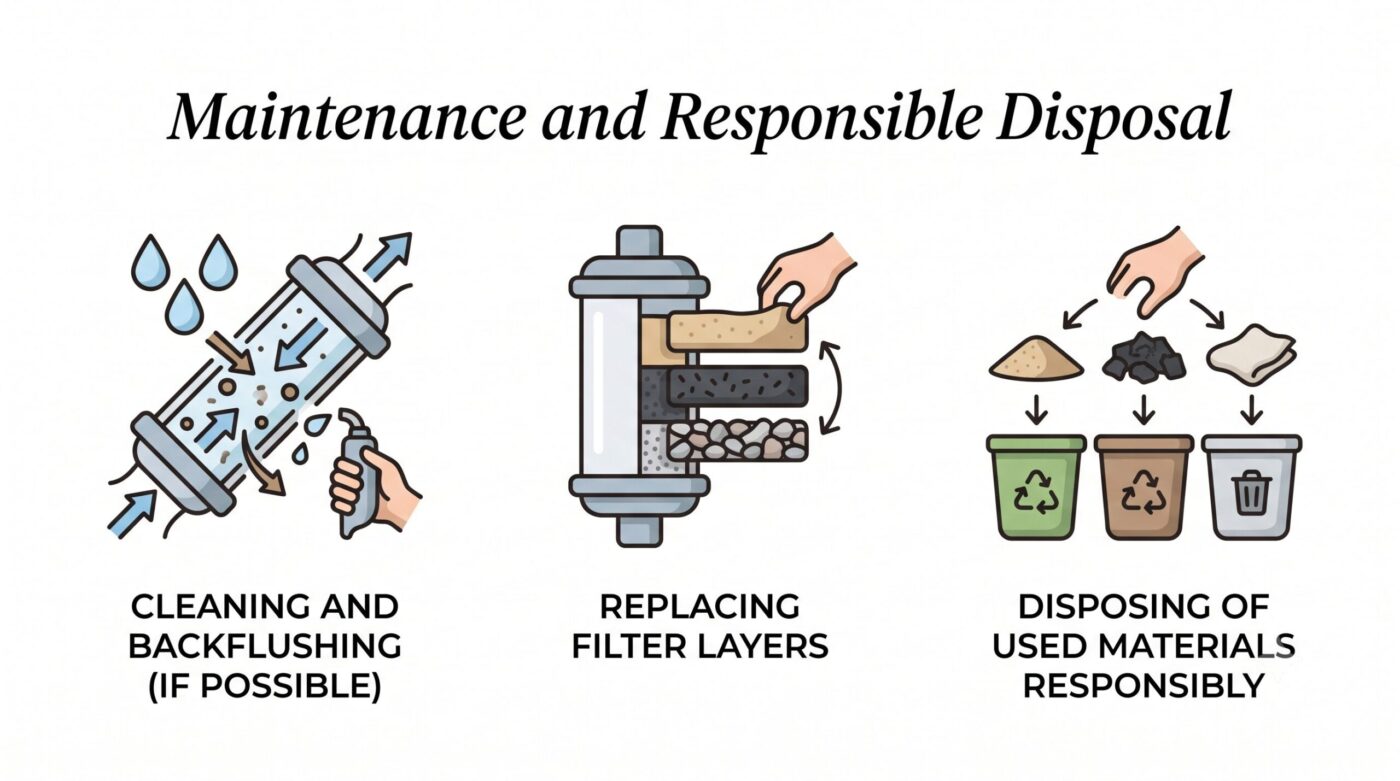
Cleaning and Backflushing (if possible)
With a simple natural filter, extensive cleaning or backflushing is difficult. You can try to rinse the top layer of cloth or grass, but for the sand and charcoal, it’s often easier to replace them.
Replacing Filter Layers
If your water flow slows significantly or the filtered water remains cloudy, it’s time to replace your filter media. Disassemble the filter, discard the old sand and charcoal, and replenish with fresh materials. The gravel can often be rinsed and reused.
Disposing of Used Materials Responsibly
When you’re done with your filter or need to replace layers, scatter the natural materials (sand, gravel, charcoal, plant fibers) back into the environment, away from water sources. If you used a plastic bottle, pack it out with you. Always practice Leave No Trace principles.
Conclusion
Learning to build a natural water filter is more than just a neat trick; it’s a fundamental skill for anyone venturing into the outdoors or preparing for emergencies. While it’s an excellent first line of defense against sediment and some larger impurities, always remember its limitations. This DIY filter is a crucial step in making questionable water safer, but for true purification, boiling or chemical treatment remains essential. Practice this skill, understand its nuances, and you’ll be better equipped to face whatever challenges nature throws your way. Stay safe and prepared!